How to Fold a Paper Airplane That Actually Flies (7 Designs, Ranked)
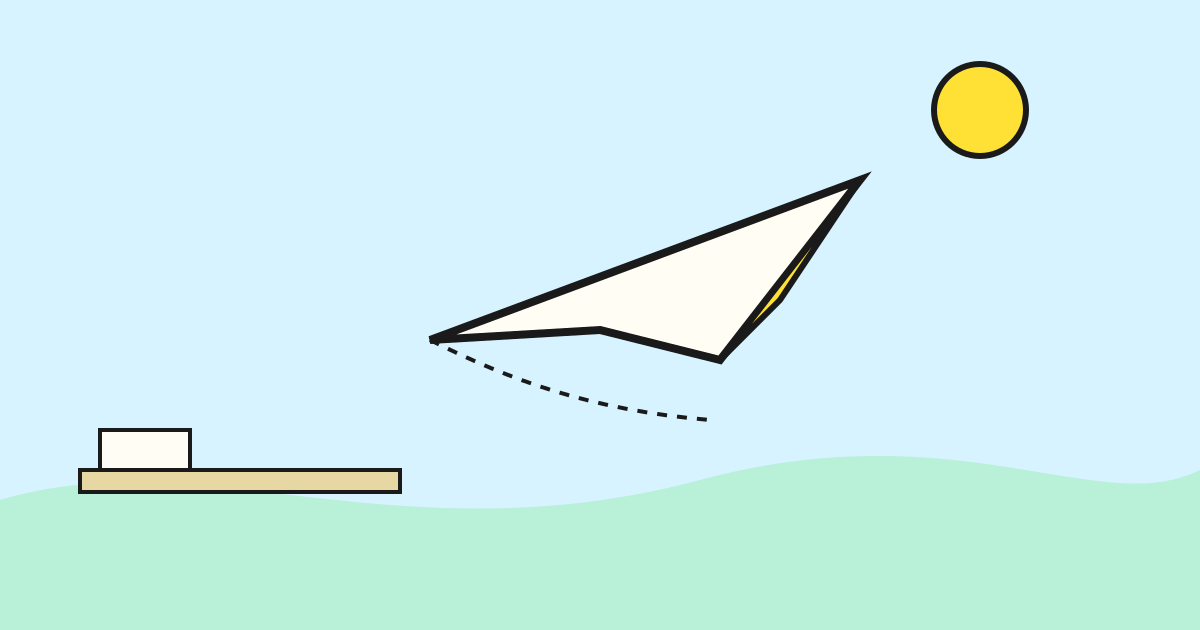
From the basic dart to the world-record Suzanne: a complete guide to in-meeting aeronautics
The projector hums, a colleague scrolls through slide 42, and a lukewarm coffee has congealed into a resigned companion at your elbow. On the table, under the glow of fluorescent lights, lies a single sheet of office paper, crisp along one edge, slightly bent where someone folded it in a hurry. You fold the corner back almost by muscle memory. The room narrows to the soft sound of paper creasing and the tiny physics problem in your hands: how to turn that rectangle into something that will glide, pierce, or disappear without causing a scene.
There are seven ways to answer that question, and each trades off distance, stability, stealth, and how forgiving it is when your folding is less than artisanal. This guide ranks those designs not by mystique but by which ones actually perform in ordinary rooms like this one: cubicle-lit, plant-in-the-corner, projector glow and all. We start, as many of us do, with the Classic Dart: simple folds, sharp lines, and a surprising amount of reliability.
The Physics of Paper Airplanes (Briefly)
While seemingly simple, a paper airplane operates on the same fundamental aerodynamic principles that govern its full-sized counterparts: lift, thrust, drag, and gravity. Understanding these forces, even superficially, can dramatically improve your folding and launching technique, transforming a mere paper projectile into a finely tuned flying machine. The key differences, however, lie in their application and control:
- Thrust in a paper airplane comes entirely from your throw, not an engine. This means your arm speed, release angle, and follow-through are as crucial as the design itself. A perfectly folded plane can be ruined by a poor launch, and conversely, a well-executed throw can coax surprising performance from a less-than-optimal design.
- Lift is the upward force generated by the wings as air flows over and under them. Flat wings generate less lift than curved ones, which is why subtle adjustments, like bending wing edges, can significantly alter a plane's flight path and duration. The angle at which the wing meets the air (angle of attack) also plays a critical role; too steep, and you create drag and risk a stall; too shallow, and you don't generate enough lift.
- Drag is the resistance an object encounters as it moves through the air. A sleek, aerodynamic design minimizes drag, allowing for greater speed and distance. Conversely, a poorly folded plane with crumpled edges or an uneven shape will experience more drag, leading to a shorter, less stable flight.
- Gravity is the constant downward pull. To fly, a paper airplane must generate enough lift to counteract gravity, and enough thrust to overcome drag.
Stability is perhaps the most critical factor for a successful flight, especially indoors. It's determined by the delicate balance between the center of gravity (the plane's balance point) and the center of lift (the average position of the upward aerodynamic forces). If the center of gravity is too far forward (nose-heavy), the plane will dive. If it's too far back (tail-heavy), the plane will stall, wobble uncontrollably, or even fly backward before falling. The ideal paper airplane for indoor use is typically slightly nose-heavy (which promotes a stable, predictable glide), has a moderate wingspan-to-length ratio (optimizing for both lift and maneuverability), and is, of course, crafted from standard 8.5×11 copy paper (for its ubiquitous availability and ideal weight).
Advanced Aerodynamics: Beyond the Basics
While the four fundamental forces provide a solid foundation, truly mastering paper airplane flight involves appreciating more nuanced aerodynamic concepts. Understanding these can help you troubleshoot flight issues and even innovate your own designs.
Dihedral and Anhedral Angles
One often-overlooked aspect of stability is the dihedral angle. This refers to the upward angle of the wings from the fuselage when viewed from the front. Most successful paper airplanes, and indeed most real aircraft, incorporate a slight dihedral.
- Dihedral: When a plane with dihedral is disturbed by a gust of wind and tilts to one side, the lower wing presents a greater angle of attack to the oncoming air, generating more lift than the higher wing. This differential lift pushes the lower wing up, naturally restoring the plane to a level flight. This self-correcting mechanism is crucial for stable flight and is why many of our top-ranked designs feature or benefit from a subtle upward bend in their wings.
- Anhedral: Conversely, an anhedral angle (wings angled downwards) makes a plane less stable in roll but can be used in specific high-performance aircraft for maneuverability. For paper airplanes, especially for beginners, a slight dihedral is almost always preferable for a predictable flight path.
Aspect Ratio and Wing Loading
These two concepts are vital for understanding a plane's glide performance and maneuverability.
- Aspect Ratio: This is the ratio of the wingspan to the average chord (width) of the wing. High aspect ratio wings (long and narrow, like those on a glider) are efficient at generating lift and reducing drag, leading to longer glide times and distances. Low aspect ratio wings (short and wide) are generally more maneuverable but less efficient. The Glider design, for instance, leverages a higher aspect ratio for its exceptional hang time.
- Wing Loading: This is the total weight of the plane divided by its wing area. A low wing loading means the plane has a large wing area relative to its weight, allowing it to fly slower and with less power, resulting in a gentler glide. High wing loading (heavy plane, small wings) requires more speed to generate lift and tends to fly faster and less stably. When you choose a heavier paper, you increase the wing loading, which is why standard 80gsm paper is often recommended. It strikes a good balance.
By subtly adjusting these elements through precise folding and minor tweaks, you can fine-tune your paper airplane's performance, transforming it from a simple projectile into a miniature marvel of engineering.
The 7 Designs, Ranked
1. The Classic Dart ⭐⭐⭐⭐⭐
Best for: Unrivaled reliability, impressive distance, and an ease of folding that borders on subconscious.
The Classic Dart isn't just a paper airplane; it's an institution. It's the default for a reason, a testament to elegant simplicity and effective aerodynamics. It's fast, remarkably stable, and perhaps its greatest asset in a professional environment: it can be folded in under 2 minutes without you ever needing to break eye contact with the speaker or betray your clandestine activity by looking at your hands. This makes it the undisputed champion for discreet, yet effective, in-meeting aerial deployment.
How to fold:
- Begin by folding the paper in half lengthwise. This establishes your central axis. Crease firmly, ensuring a crisp, straight line.
- Take the top two corners and fold them down to meet this center crease, forming a neat triangular point at the top.
- Now, fold the outer edges of this newly formed triangle down to the center crease once more. This further sharpens the nose and adds crucial weight to the front.
- Fold the entire plane in half along the original center crease, bringing the wings together.
- With the plane folded, create the wings by folding each side down. Aim to leave about 1cm of the fuselage (the central body) exposed below the wing fold. This provides a stable base for gripping.
- For enhanced stability and lift, bend the wing tips up slightly, approximately 5mm. This subtle adjustment, known as dihedral, helps the plane self-correct in flight.
Launch technique: The Classic Dart thrives on a smooth, level motion. Hold the plane firmly at the fuselage, near the center of gravity. Extend your arm forward, releasing the plane with a gentle push. Crucially, resist the urge to flick your wrist; this often imparts an unstable spin. Think of it as pushing the plane through the air, rather than throwing it at something.
Conference room range: With a well-executed throw and a properly folded Dart, you can expect a respectable range of 8-12 meters. Its speed and stability make it excellent for reaching distant targets, such as the aforementioned potted plant.
---
2. The Nakamura Lock ⭐⭐⭐⭐½
Best for: Achieving maximum distance, maintaining exceptional stability even in unpredictable air currents, and demonstrating a touch of origami prowess.
Designed by the ingenious Japanese origami master Eiji Nakamura, this design is a marvel of paper engineering. Its signature feature is a unique locking mechanism at the nose, which, unlike simpler designs, prevents the front from splaying open or deforming during high-speed flight. While it demands a slightly more intricate folding process, the resulting stability and aerodynamic efficiency are well worth the effort, making it a formidable contender for any distance challenge.
How to fold:
- Start by folding the paper in half lengthwise, then unfold it. This establishes a central guideline.
- Fold the top two corners down to the center crease, similar to the initial steps of the Classic Dart.
- Now, fold the resulting triangular section down, but this time, leave approximately 2cm of the triangle visible below the fold line. This creates a more robust nose.
- Fold the new top corners (which are now part of the larger folded section) to the center crease again. This further refines the nose shape.
- Here's the "lock": Take the small, exposed triangle at the very bottom of the folded nose section and fold it up over the corner folds you just made. This tucks everything in, creating the signature locking mechanism that gives the Nakamura its superior structural integrity.
- Fold the entire plane in half along your original lengthwise crease.
- Finally, fold the wings down, ensuring they are symmetrical. You can experiment with the angle, but a moderate, slightly upward-angled wing often works best.
Launch technique: The Nakamura Lock benefits from a powerful, yet controlled, launch. Its robust nose can withstand a stronger throw than many other designs. Aim for a slightly upward trajectory, allowing its inherent stability to carry it far.
Conference room range: With its superior aerodynamics and locked nose, the Nakamura Lock can consistently achieve distances of 10-15 meters, often gliding further than the Classic Dart under similar conditions.
---
3. The Glider ⭐⭐⭐⭐
Best for: Unparalleled stealth, near-silent flight, and maximizing hang time, making it the ultimate choice for subtle aerial maneuvers.
The Glider is the stealth bomber of conference room aviation. Its wide wingspan and blunt, yet aerodynamic, nose are specifically engineered for slow, quiet, and extended flight. If your objective is to have a paper airplane gracefully traverse the room, perhaps landing gently on a colleague's notes without a sound, the Glider is your weapon of choice. It prioritizes elegance and duration over sheer speed or distance.
How to fold:
- Fold the paper in half lengthwise, then unfold. This provides your central guide.
- Fold the top edge down about 3cm. This creates a leading edge for the wing.
- Fold this edge down again, by the same amount. This adds weight to the front and reinforces the leading edge.
- Fold the entire sheet in half along the original lengthwise crease.
- Now, fold the wings out. The key here is a shallow angle. Don't fold them too steeply. The wider the wingspan, the better the glide.
- For optimal lift and stability, bend the trailing edge of each wing up slightly. This creates a subtle airfoil shape, enhancing its gliding capabilities.
Launch technique: The Glider is not meant to be thrown with force. Instead, launch it gently at a slight upward angle, almost as if you're releasing a bird. The goal is to allow it to find its own air currents and float. A hard throw will only disrupt its delicate balance and send it tumbling.
Conference room range: While not a distance champion, the Glider can cover 6-10 meters with exceptional hang time, making it appear to float effortlessly across the room.
---
4. The Hammer ⭐⭐⭐½
Best for: Pinpoint accuracy, short-range precision, and delivering a satisfying, direct impact.
The Hammer is a specialist. It's not designed for graceful glides or record-breaking distances. Instead, its distinctive blunt nose and wide, robust body make it surprisingly accurate and stable over shorter distances. If your goal is to hit a specific, perhaps challenging, target, like a specific section of the whiteboard or a particularly distracting colleague's coffee cup (we don't recommend this, of course), the Hammer is your best bet. It flies with a directness that belies its paper construction.
How to fold:
- Fold the paper in half lengthwise, then unfold to create a central crease.
- Fold the top edge down about 5cm. This creates the broad, blunt nose.
- Fold the top corners in to meet the center crease, forming a wide, flattened point.
- Fold the point you just created up to meet the top edge of the corner folds. This reinforces the blunt nose and adds forward weight.
- Fold the entire plane in half along the original lengthwise crease.
- Finally, fold the wings down. Given its design, you can afford slightly wider, flatter wings for more stability.
Launch technique: The Hammer benefits from a firm, straight throw. Aim directly at your target, and release with a confident, level motion. Its stability will help it maintain its trajectory.
Conference room range: Expect a range of 5-8 meters. Within this range, its accuracy is its defining feature.
---
5. The Stunt Plane ⭐⭐⭐
Best for: Pure entertainment value, executing thrilling loops, dives, and other aerial acrobatics.
The Stunt Plane sacrifices efficiency and predictability for sheer spectacle. It's not about getting from Point A to Point B; it's about the journey, specifically one filled with dramatic twists and turns. While it might not win any distance competitions, it will undoubtedly win smiles and perhaps even a few gasps of admiration. This is the plane you deploy when the meeting has truly gone off the rails and a little levity is desperately needed.
How to fold:
- Start with the familiar base of the Classic Dart. This provides a good, stable foundation.
- Instead of bending the wing tips up for stability, fold them down. This creates an inverted dihedral, which reduces inherent stability but enhances maneuverability, making loops easier.
- The crucial element for stunts: add small vertical stabilizers. To do this, take the trailing edge of each wing and fold up a small section (about 1-2cm) vertically. These act like rudders and elevators, allowing for more control over the plane's attitude.
Launch technique: For loops, throw the Stunt Plane at a steep upward angle with moderate force. The downward-bent wingtips and stabilizers will encourage it to arc upwards and then loop back. For turns, adjust one of the vertical stabilizers more than the other, or slightly twist one wing, and throw with a gentler, level motion. Experimentation is key here!
---
6. The Boomerang ⭐⭐½
Best for: The sheer novelty of returning to sender, and undeniably impressing colleagues with a display of advanced paper aeronautics.
The Boomerang is less about practical flight and more about the "wow" factor. With the right fold and, more importantly, the right launch technique, this design will curve gracefully through the air and, astonishingly, return to the thrower. This requires significant practice and a nuanced understanding of its unique aerodynamics. It is emphatically not recommended for a first attempt in a high-stakes professional setting, unless you enjoy retrieving your creations from under the CEO's desk.
How to fold:
- Start with a standard rectangular piece of paper.
- Fold the paper in half lengthwise, then unfold.
- Fold the top two corners to the center crease, forming a triangle.
- Fold the entire top section down, so the point of the triangle aligns with the bottom edge of the paper.
- Fold the top corners of this new shape to the center crease.
- Fold the small triangle at the bottom up to lock these folds.
- Fold the entire plane in half lengthwise.
- Now, for the boomerang effect: Fold the wings down, but crucially, ensure there's a significant upward bend (dihedral) in the outer half of each wing. Also, slightly curl the leading edge of each wing upwards, creating a subtle scoop. This asymmetrical lift is what generates the curve.
Launch technique: This is where the magic happens. Hold the Boomerang by the nose, with the wings pointing away from you. Throw it with a sidearm motion, imparting a strong spin, almost like throwing a frisbee, but with a slight upward angle. The spin, combined with the unique wing shape, creates the returning flight path. Practice in an open space!
---
7. The Concorde ⭐⭐
Best for: Looking incredibly impressive while folding, and serving as a testament to complex paper craftsmanship.
The Concorde is the paper airplane equivalent of a concept car: undeniably beautiful, strikingly complex, and often, frustratingly impractical for sustained flight. Its sleek, delta-wing design is a tribute to its supersonic namesake, and the process of folding it is an exercise in patience and precision. While it might not fly particularly well, the sheer act of producing such an intricate design in a meeting can be a statement in itself. It's for the connoisseur, not the casual flier.
How to fold: (This is a simplified overview, as detailed instructions often involve many steps and diagrams.)
- Start by folding the paper in half lengthwise, then unfold.
- Fold the top corners to the center crease, then fold that section down.
- Continue to fold and unfold sections to create multiple creases that will define the delta wing shape.
- The key is to create a long, pointed nose and wide, swept-back wings that taper towards the rear. This often involves multiple inward folds and tucks.
- Form a narrow fuselage and then carefully fold out the large, triangular delta wings.
- Ensure the wingtips are slightly angled upwards for some semblance of stability.
Launch technique: Launch with moderate force, aiming for a relatively level flight. Don't expect long glides or impressive distances. Its beauty is in its form, not its function.
The Comparison Table
| Design | Distance | Stability | Stealth | Difficulty | Fun Factor |
|---|---|---|---|---|---|
| Classic Dart | ⭐⭐⭐⭐⭐ | ⭐⭐⭐⭐ | ⭐⭐⭐ | Easy | ⭐⭐⭐⭐ |
| Nakamura Lock | ⭐⭐⭐⭐⭐ | ⭐⭐⭐⭐⭐ | ⭐⭐⭐ | Medium | ⭐⭐⭐⭐ |
| Glider | ⭐⭐⭐ | ⭐⭐⭐⭐ | ⭐⭐⭐⭐⭐ | Easy | ⭐⭐⭐⭐ |
| Hammer | ⭐⭐⭐ | ⭐⭐⭐ | ⭐⭐⭐ | Medium | ⭐⭐⭐ |
| Stunt Plane | ⭐⭐ | ⭐⭐ | ⭐⭐ | Medium | ⭐⭐⭐⭐⭐ |
| Boomerang | ⭐⭐ | ⭐⭐ | ⭐⭐ | Hard | ⭐⭐⭐⭐⭐ |
| Concorde | ⭐⭐ | ⭐⭐ | ⭐⭐ | Hard | ⭐⭐⭐ |
Pro Tips for Conference Room Aviation
Even the best design can be undermined by poor technique or overlooked details. Here are some advanced tips to ensure your paper airplanes consistently achieve their maximum potential, even in the challenging environment of a corporate meeting room.
Paper selection matters, profoundly. While standard 80gsm (grams per square meter) copy paper is indeed the ideal benchmark, understanding why is crucial. Heavier paper (e.g., 100gsm or cardstock) is harder to fold precisely, and its increased weight leads to higher wing loading, requiring more thrust and resulting in a shorter glide. Lighter paper (e.g., 60gsm or newsprint) doesn't hold its shape well, making stable flight nearly impossible. The 80gsm sweet spot offers the perfect balance of rigidity for crisp creases and lightness for sustained flight. Avoid glossy paper at all costs; its slippery surface makes precise folding difficult, and the coating can add uneven weight.
Crease firmly and precisely. This cannot be overstated. Every fold is a structural element. Run your thumbnail, a pen cap, or even a ruler along every crease to ensure it's sharp and flat. Soft, rounded creases lead to unstable planes that wobble, veer off course, or simply fall. Precision in folding is paramount; even a millimeter's deviation can throw off the plane's balance and aerodynamics.
Adjust for air currents, a hidden adversary. Conference rooms are rarely still. HVAC vents, open doors, and even the collective body heat of attendees can create invisible air currents. Before a critical launch, perform a gentle test toss. Observe how the plane reacts. Does it drift left or right? Does it gain or lose altitude unexpectedly? You might need to subtly adjust a wingtip or the rudder to compensate for a prevailing draft. Think of yourself as a miniature air traffic controller.
The 5-degree rule for stability is golden. Bending the trailing edge of the wings up by approximately 5 degrees dramatically improves pitch stability. This creates a subtle "elevator" effect, preventing the plane from diving uncontrollably. However, moderation is key. Too much upward bend, and the plane will generate excessive lift at the rear, causing it to stall and fall. Too little, and it will dive. Experiment to find the perfect angle for each design and paper type.
Launch height matters more than you think. Launching from shoulder height or slightly above gives your plane more time to stabilize and achieve its optimal glide path before gravity inevitably takes over. A launch from a lower height reduces this crucial stabilization period, often leading to a shorter, less controlled flight. If you can, stand up for your launch (discreetly, of course).
Symmetry is non-negotiable. A paper airplane is a delicate balance. Any asymmetry (one wing folded slightly differently than the other, an uneven crease, or even a slightly twisted fuselage) will introduce unwanted drag or lift differentials, causing the plane to consistently turn, spiral, or dive. Take the extra moment to ensure both sides of your plane are mirror images of each other.
Consider the "trim tab" principle. For persistent flight issues, small adjustments are better than large ones. If your plane consistently veers right, gently bend the trailing edge of the right wing down or
Frequently Asked Questions
What paper is best for paper airplanes?
Standard 80gsm copy paper is ideal. It's stiff enough to hold its shape but light enough to fly well.
Why does my paper airplane dive immediately?
It's nose-heavy. Bend the trailing edge of the wings up slightly to add lift.
Why does my paper airplane stall and fall?
It's tail-heavy. Bend the trailing edge of the wings down slightly to reduce lift.
What's the world record for paper airplane distance?
As of 2022, the world record is 88.318 meters (289 feet, 9 inches), set by Dillon Ruble, Nathaniel Erickson, and John Collins.
Is it unprofessional to fold a paper airplane in a meeting?
That depends on the meeting, your role, and your organization's culture. We recommend starting with the Glider. Its quiet flight makes it the most deniable option.
What's the best paper airplane for distance?
The Nakamura Lock holds the best distance-to-difficulty ratio. For maximum distance, the Suzanne design is unmatched.
How do you make a paper airplane go straight?
Ensure both wings are folded symmetrically. Even a 1mm difference in wing angle will cause the plane to curve.
Can you make a paper airplane from a sticky note?
Yes, but the results are unpredictable. The adhesive strip adds weight asymmetrically. Use it for the Stunt Plane: the instability becomes a feature.
Partner picks
ReelShort — Original short dramas you can watch in a few minutes when you need a story, not another scroll.
Our picks
 The Klutz Book of Paper Airplanes
 Paper Airplane Kit
 Desk Fidget Toy Set
 GAN 356 M Speed Cube